


How to Install a Tape Applicator Head – Step-by-Step Setup
Tape Applicator Head
Welcome to the Tape Applicator Head installation guide. This page provides access to the English installation manual, installation drawing and video tutorial to help you understand the mounting, connection and setup process.
Use the resources below as references when integrating the tape applicator head with your existing packaging or folder-gluing production line.

Installation Resources
Access the main technical materials for installing and setting up your Tape Applicator Head. We recommend reviewing the manual and installation drawing before starting work.
English Installation Manual
Download the English manual for detailed installation instructions and technical reference information.
Download Manual (DOCX) →Installation Video Tutorial
Watch the installation video to see the equipment and follow the visual guidance during setup.
Watch Video Tutorial →Installation Drawing
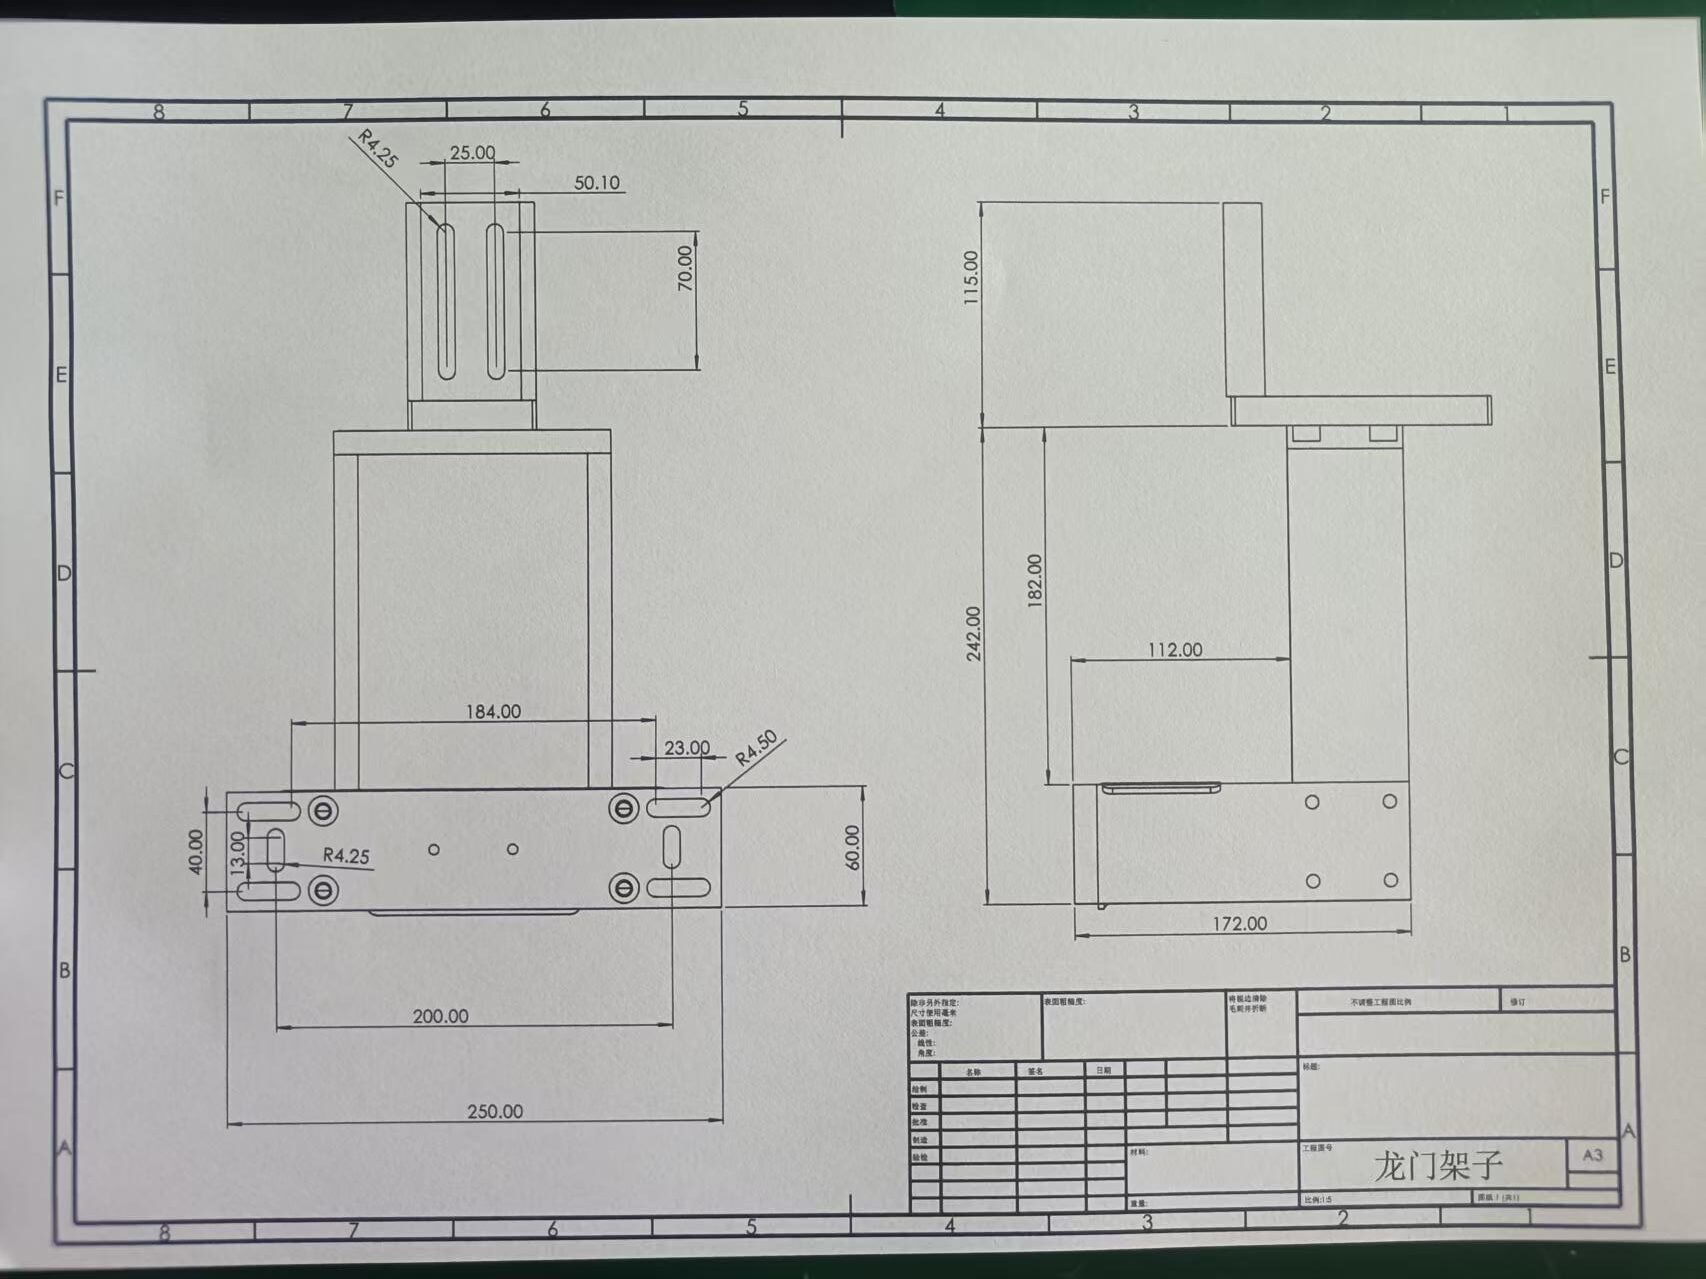
View the installation drawing as a reference for the mounting arrangement and equipment layout.
View Installation Drawing →Tape Applicator Head Installation Process
The following is a general installation overview. Always refer to the official English manual and installation drawing for the actual mounting arrangement and connection details of your equipment.
Check the Machine and Installation Position
Confirm the host machine model, required tape type, production speed and available installation space. Check the mounting position and make sure there is sufficient clearance for operation and maintenance.
Mount the Tape Applicator Head
Position and secure the applicator head using the specified mounting arrangement. Refer to the supplied installation drawing and manual for the correct mounting orientation and alignment.
Connect the Pneumatic and Signal Systems
Connect the pneumatic supply and the required control or signal connections according to the official wiring and pneumatic diagrams. Check that all connections are properly secured before operation.
Configure the Control Parameters
Configure the relevant application parameters through the machine’s HMI or controller. Depending on the configuration, these may include tape application length, segment gap and application speed.
Check and Calibrate the Sensor
Check the photoelectric sensor and calibrate it for the carton format and tape specification being used. Confirm that the sensor detects the workpiece correctly before production.
Perform a Test Run
Run a test using the host machine’s approved startup procedure. Check tape position, application length and cutting results. Make any necessary adjustments before starting continuous production.
Important Safety Notice: Installation and electrical or pneumatic connections should be completed by qualified personnel. Stop and isolate the host machine’s power and compressed-air supply before installation or maintenance. Follow the host machine’s safety procedures and the official installation manual. Do not guess wiring terminals, pneumatic settings or mounting specifications.
Watch the Installation Video
Follow the video tutorial for a visual reference to the Tape Applicator Head installation process.
Tape Applicator Head Installation Drawing
Refer to the drawing when checking the installation layout and mounting arrangement. Click the image to view the original drawing in a larger window.
Need Help with Installation?
For detailed installation instructions, please download the English manual and refer to the installation drawing. For questions about machine compatibility, mounting, pneumatic connections or control integration, contact Kylin Machines for technical assistance.


Leave a Reply